


Cool Repairs
The possibility of uses for Rapid Repair are endless! From home hobbiest to industry use, Rapid Repair can be used for any number of applications.
Featured Repairs
Engine Mount
Various Repairs:
Hose Line
Sewer Coupler
Drip Line
PVC Plumbing
Swimming Pool
Hole Saw Blade
Lawnmower
Wire Hook
Dryer Switch
Fence Chop Saw
Wiper Blade
Motorcycle Front Fender
Motorcycle Tail Section
Motorcycle Fairing
Car Bumper Repair
Sprinklers
Ripped Power Cord
Refrigerator Door Cam
Broken Mosaic Pot
Porcelain Handle
Cracked Potters Wheel
Broken Clamp
Car Remote
Share your application with us!
In order to spread the word about the many uses of RR, we encourage you to send in your applications. We'd love to hear what repairs/applications you have made with Rapid Repair. Send in a few photos and details about your application and we may even add it to the site!
Please submit your RR application/repair to:
applications@rapidrepairall.com
Engine Mount
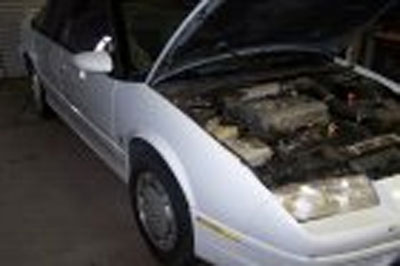
This is my all-time favorite repair! To understand why, I will have to relate its history.
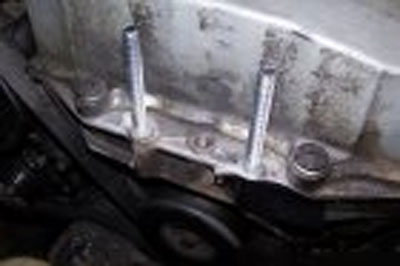
Bruce purchased this Saturn as a "junk, tow away" car. The original motor mount studs had broken off into the engine. Prior to him purchasing it, an overzealous "mechanic" had tried unsuccessfully to remove the broken studs by means of drilling, but off center. We were left with oval shaped holes that were impossible to simply drill and tap oversize.
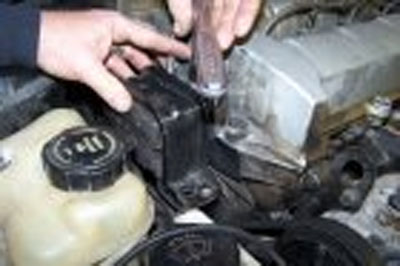
Two studs were purchased at the hardware store with the same size and thread pitch as the originals that had failed. We simply put the studs in the oblong holes, and taped up the sides where the aluminum had cracked off. We mixed the glue to where it was a little on the runny oatmeal side and poured it in. The screwdrivers were wedged up to keep the studs pointed in the correct direction, and we used the motor mount as an alignment template.
It was allowed to set overnight and we assembled everything together that next morning. We were fortunate enough to be able to extract one of the 3 broken studs, so we still had a good template to center everything. we simply put a new screw into that hole. The 2 glued in studs were in there like concrete. We took a grinder and removed the excess threads that were poking through the motor mount. We drove it around a little and all was well. Bruce sold the car for I believe $1200. Not bad for a car written off by even other "mechanics".
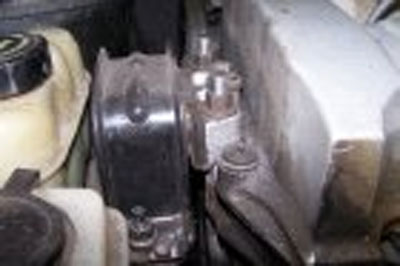


The Suds glued in place and secure
Another angle of the glued in studs
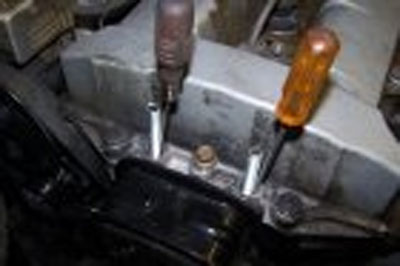
Screwdrivers used to keep studs in place while the glue began to set
We used tape to build a "dam" for the glue to form against
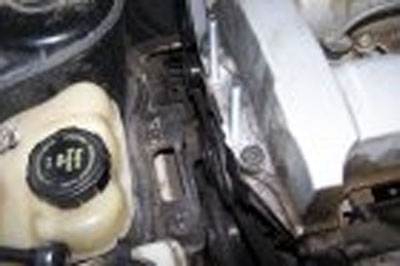
Screwing on the motor mount to ensure proper alignment with new studs
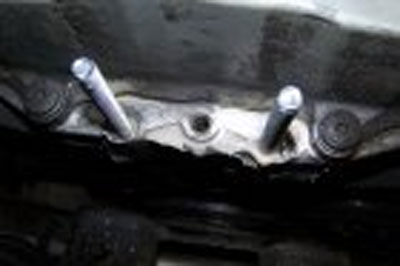
Top view of glued in studs
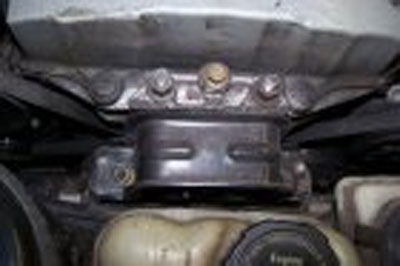
Top view of motor mount

Different angle of completed repair